
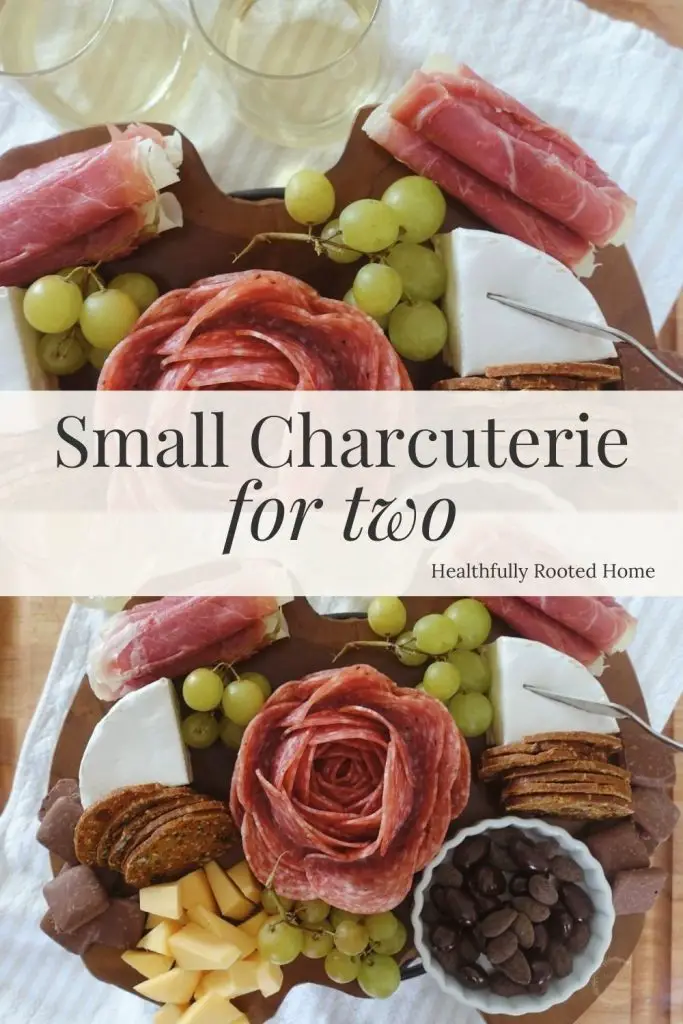
Small Charcuterie Board
Date nights, picnics, small parties, or get-togethers call for a small charcuterie board. Charcuterie boards are hors d’oeuvres typically seen on a large platter ready to feed a crowd. But when a more intimate occasion occurs, you need a smaller appetizer.
In fact, it can be challenging to make a smaller charcuterie platter, so I’m going to give you some tips on how to downsize your next grazing board.
Related: How to make a salami rose
Related: Butter Board Tutorial
This post contains affiliate links, which means I make a small commission at no extra cost to you. See my full disclosure here.
- What is a Charcuterie Board
- How to Make a Small Charcuterie Board
- How to Store a Charcuterie Board
- Tips for a Small Charcuterie Board
- How to Make a Charcuterie To Go
- Elements of the Perfect Charcuterie Board
- Serving Suggestions
- How to Choose a Platter for a Mini Charcuterie Board
- How to Save Money on Charcuterie Boards
- Shop this Post
- More Appetizer Recipes
- Small Charcuterie Board FAQ
- Pin it – How to Make a Small Charcuterie Board
- Print the Small Charcuterie Board Recipe
- Small Charcuterie Board for Two
- how to store a charcuterie board
- small charcuterie board Tips
- How to choose the perfect platter for a mini charcuterie board
- About Me
What is a Charcuterie Board
A charcuterie board is typically an assortment of cured meats and has lately been expanded upon to include cheeses, crackers, and other snack food that pairs well with the meat.
I like to even add chutneys, and glazes to my charcuterie boards to drizzle on top meat and crackers. Charcuterie boards are the perfect appetizer for social gatherings as they make for great grazing tables.
How to Make a Small Charcuterie Board
Small charcuterie boards are perfect for a night in alone, a date night at home, or a get-together with one other couple. Your charcuterie board could be a starter, or the star of the show and be the main course.
It’s easy to go overboard when shopping for a small charcuterie board because there’s so much that would be delicious on one – use my tips below on how to make a small charcuterie board.
Ingredients
See the section “elements of a charcuterie board” below where I talk about ratios and how to keep your board small.
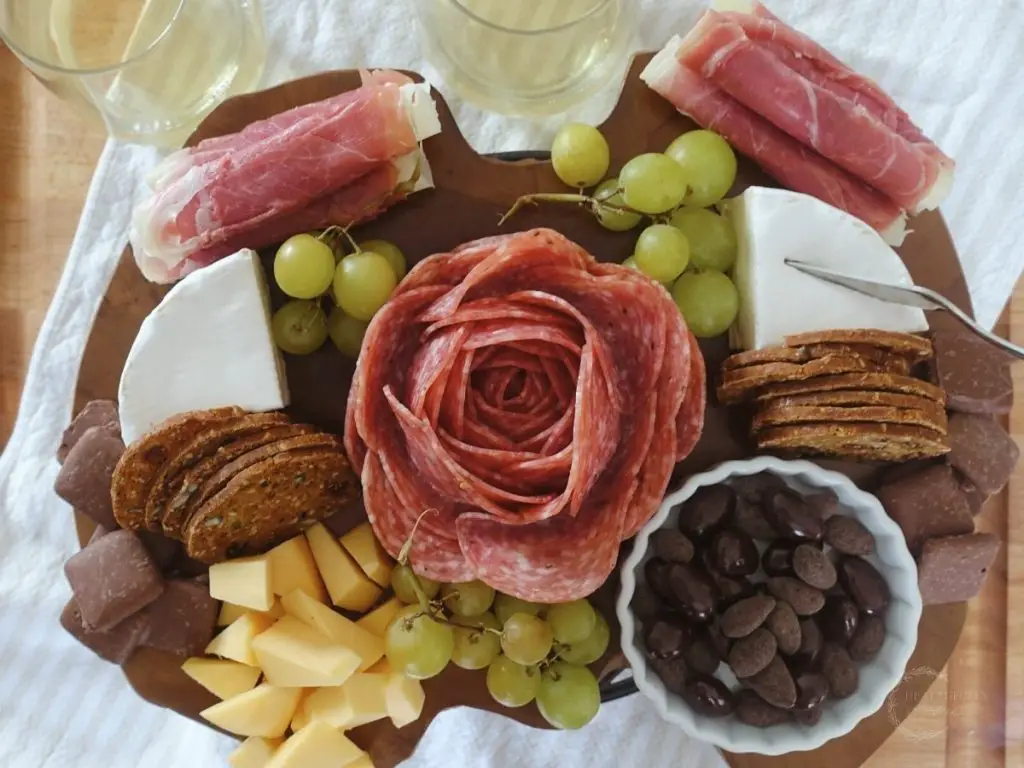
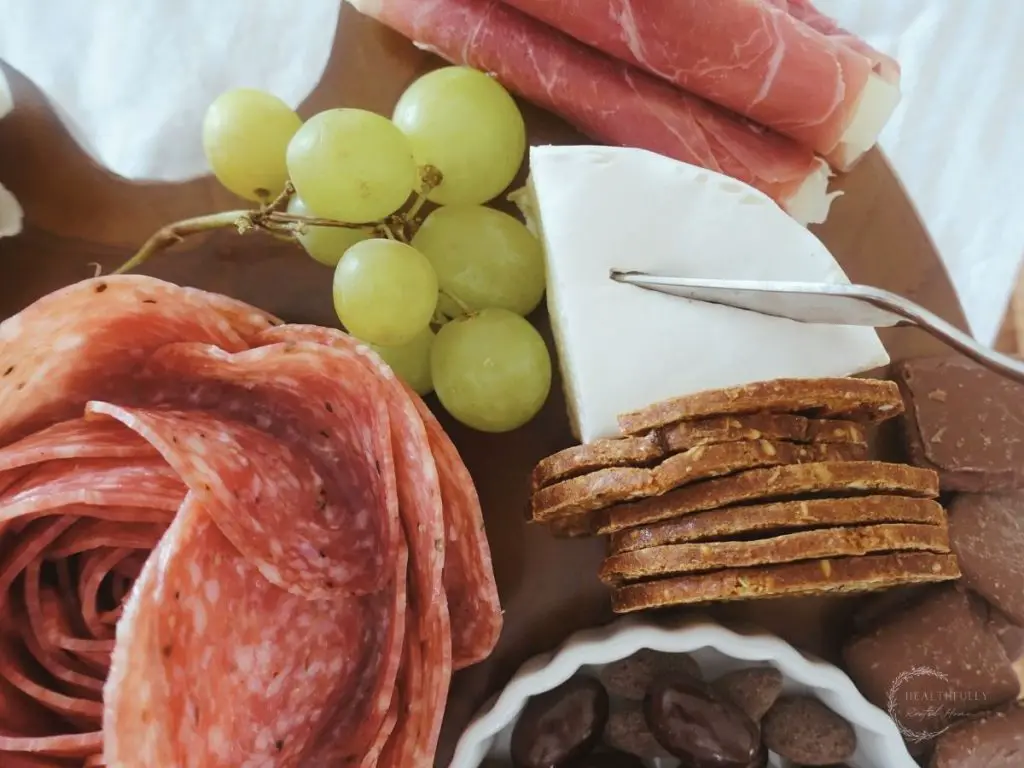
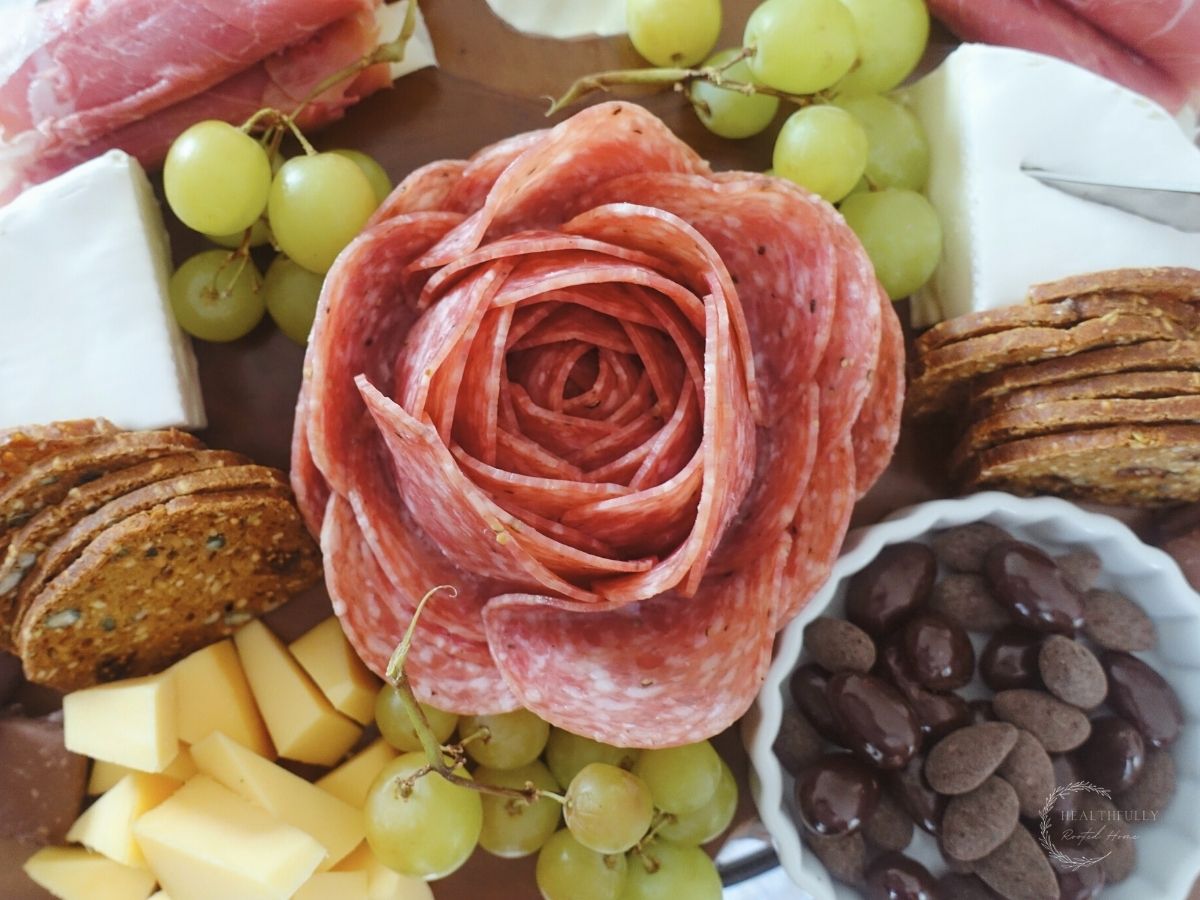
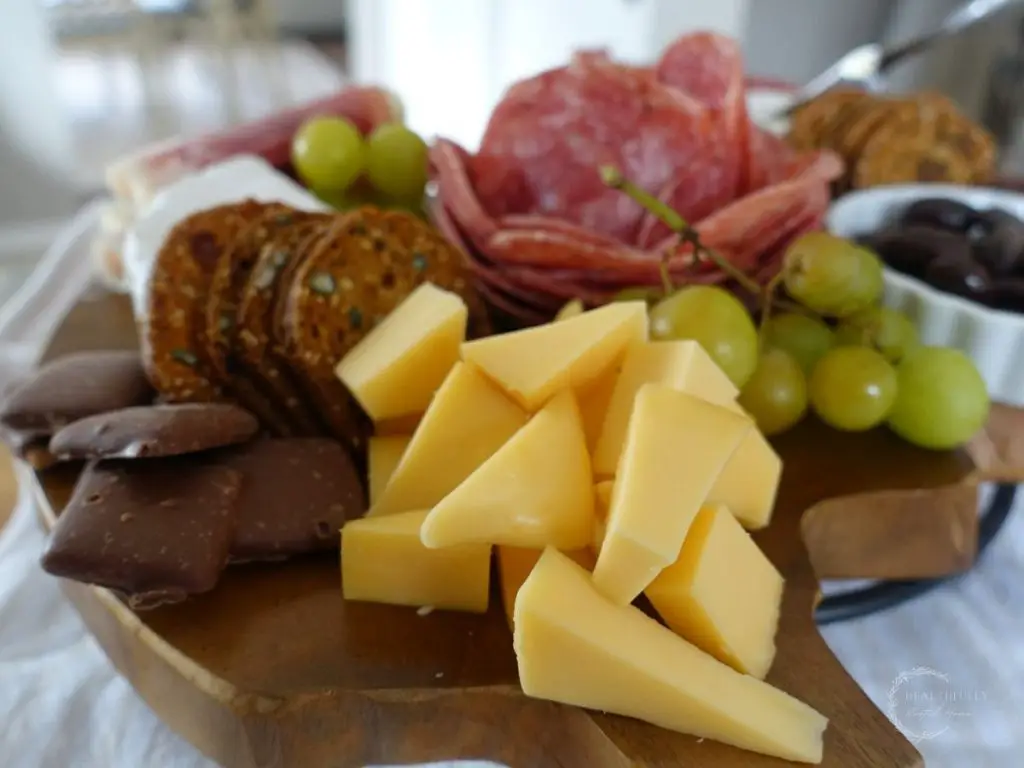
Meat – Cured meats are the obvious choice for a charcuterie, whether you choose peppered salami, genoa salami, prosciutto, pepperoni, or any others you prefer. For the small charcuterie board, I made in the recipe below, I made a salami rose as the focal point of the board.
Cheese – Even more options than one could imagine when it comes to cheese. There are soft cheeses, hard cheeses, smoked, blue, goat, and so much more.
Fruit – Fresh fruit is a great addition to balance out the hearty meats and cheeses of a grazing board. Keep it small and just use one type of fruit. I chose grapes, but you could use apple slices, pomegranate, or whatever your heart desires.
Crackers – You need a vessel to enjoy the meats and cheeses and crackers, crostini, or your favorite crusty bread are a perfect vehicle.
Sauces/dips – It’s nice to have something to dip your mini meat/cheese sandwiches in too! I like to use chutney, balsamic-fig glaze, honey with the honeycomb, or stone-ground mustard for this. This is totally optional and might not make it to your small charcuterie.
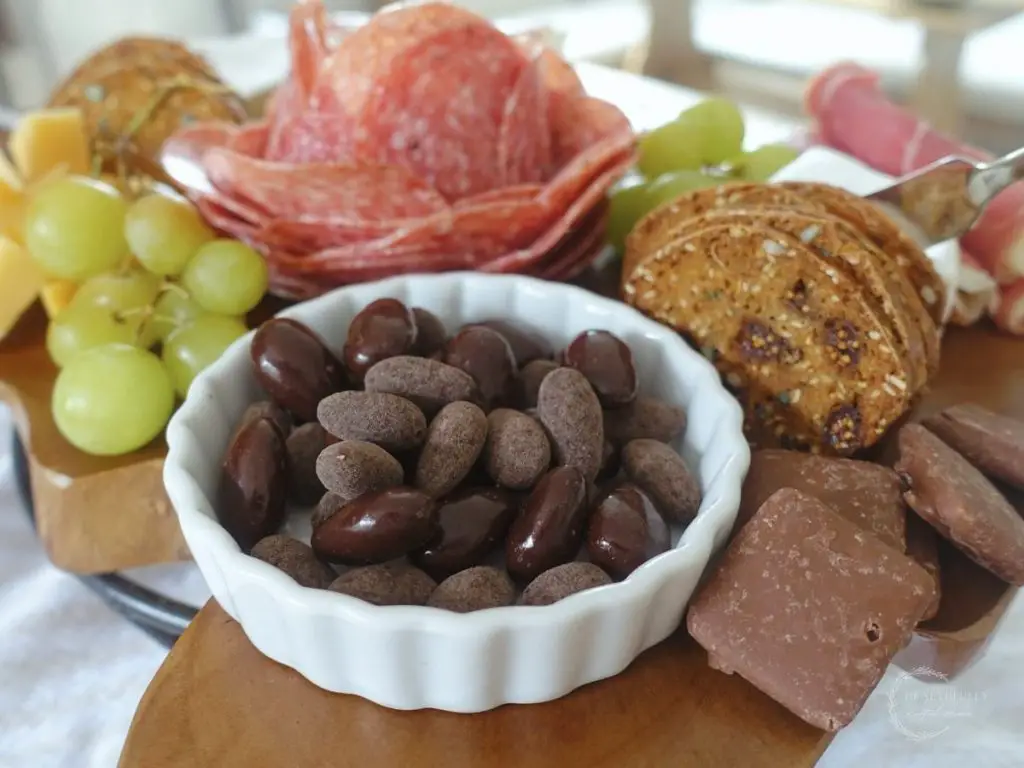
Sweets – Also optional, but adds to the excitement of a charcuterie board, in my opinion! I like to get fancy chocolate, like Himalayan sea salt almonds, cocoa-dusted nuts, or chocolate-covered graham crackers to act as a filler for my small charcuterie boards.
Related: chocolate-covered graham crackers recipe
Steps for making a small charcuterie board
- Choose a platter – see tips below on how to choose the right platter.
- Create a focal point – this is optional, and some people like more of a random assortment, but I like to work off of a focal point.
- Raid your pantry – use what you already have to get your charcuterie board started. You might have more than you think!
- Shop for the extras – the fun part, make a list and fill in any gaps (see tips below for saving money on a charcuterie board).
- Assemble the board – see below for specifics.
How to assemble a charcuterie board
There are so many ways to assemble a charcuterie board. Some say to start with the cheese, some say the meat. Others like to start with the jar or big things first.
Personally, I like to start with the larger items and then work my way out to the smaller items. Here’s exactly how I make assembling a charcuterie board easy.
How to assemble a charcuterie board
- Start with big items or focal points
You have to start somewhere, and I like to start with the biggest items and/or my centerpiece. This will get the ball rolling and everything else can be placed around that.
- Work your way down from largest to smallest items
Once you have your large items placed, continue on that same path and move on to the next largest item, then next, and so on until you’re done.

- Use symmetry to guide you
This is optional, but I like to keep my small charcuterie boards fairly symmetrical and place the same things on either side of the focal point. This is pleasing to the eye and makes it easy for me to know what goes where.
- Rearrange as needed.
Once you have everything placed, there might be some rearranging that’s necessary. Fix all the weird spots and fill in with more as needed.
- Finishing touches
Finally, place any spoons, cheese knives, or last-minute garnishes on your charcuterie platter.
How to Store a Charcuterie Board
Since you’re making a small charcuterie board, it’s likely you won’t need to store anything after all, but, if you do, here’s how to store your leftovers.
The storing process of a charcuterie board starts before you even assemble the board – by saving your packaging! For example, if you have nuts that came in a bag or container, save it so you can pour the nuts back in.
Then, be sure to pack things separately and store them properly. Meat and cheese should go in airtight containers and be stored in the fridge, crackers in the pantry, etc.
Tips for a Small Charcuterie Board
Use canisters & ramekins – these can help to add texture, height, and functionality to your charcuterie. Use them to add sauces, nuts, or anything you’d like to keep separate from the rest of the board.
Don’t overthink it – just start and don’t overthink it. Once you get the ball rolling with assembling your board the rest comes easy.
Shop discounts – give yourself a goal to find everything at a discount store or in the discount section – this can help to spark your inspiration for the whole board!
Find inspiration – go to Pinterest and find inspiration!
Use what you already have – You probably have some charcuterie board elements in your pantry right now! I always find weird things in my pantry that we wouldn’t eat on a regular basis, but are great for a charcuterie board.
Make a focal point – I like to use a focal point, like a salami rose, to be the centerpiece for my charcuterie boards.
Vary heights – Use variable heights to create aesthetic appeal.
Add a variety of colors and textures – this also adds to the visual appeal of a charcuterie board. Using contrasting colors and textures makes for a beautiful board.
Garnish with something edible – I like using fruit as a garnish, but you could use a tasty herb too!
Have a theme to draw back to – having a theme to your charcuterie can act as a good anchor for creating your board.
How to Make a Charcuterie To Go
To make a charcuterie board to go, you have a couple of options. First, you could bring everything and assemble it on location, or, you could assemble the board in a baking dish with a lid (or plastic wrap over it).
Option 1: Assemble on location
- Pack all the ingredients to your charcuterie board, along with the platter itself, and assemble at the party.
- Be sure to save the containers, or bring separate containers and bags to store the leftovers.
Option 2: Charcuterie in a dish
- Find the right-sized baking dish, preferably one with a lid.
- Assemble all the ingredients that can be refrigerated without getting soggy. Things like meat, cheese, fruit, and even chocolate can go in there. Then, save things like crackers and bread that would dry out in the fridge for when you arrive onsite.
- Store the pre-made charcuterie dish in the fridge until you’re ready to go. When you arrive at the party, just add your bread and crackers, rearrange as needed, and enjoy!
Elements of the Perfect Charcuterie Board
There are so many options when it comes to the specific ingredients you use for a charcuterie board. Here are some ideas!
Meat
For a small charcuterie board, I’d choose 1-2 meat options. consider 2-5 oz. per person when deciding on how much meat. Choose a couple of options from different categories below. For example, choose one whole meat and one smooth, or one dry and one cured.
Meat options
- Whole meat: prociutto, bresaola and jamòn
- Smooth meat: rillettes, and pate.
- Cured: Salami, Saucisson sec, Spanish chorizo
- Dry: bacon, or pancetta
Cheese
I like to stick to the same principles for cheese and have 1-2 options and consider 2-5 oz. per person. Choose a couple of options from different categories below. For example, choose one hard cheese and one soft, or one crumbly and one firm.
Cheese options
- Hard cheese: chunks of parmesan, smoked gouda, asiago
- Firm cheese: gruyere, comte, manchego, colby, cheddar
- Semi-soft cheese: havarti, butterkäse, muenster
- Soft cheese: burrata, mascarpone, brie
- Blue cheese: gorgonzola, Dunbarton blue, marbled blue jack
- Crumbly cheese: feta, goat cheese
Crackers/Bread
For small charcuterie boards, you should have about 2 types of bread or cracker options as a vehicle for the meats and cheeses. This is where you can get creative with textures! Have some crackers with sesame seeds, some with ripples on the surface, etc.
Bread & cracker options
- Bread: French sourdough, asiago ciabatta or raisin-pecan rye, crostini
- Crackers: water crackers, crispy breadsticks, dried fruit crackers, multigrain crackers.
Fruit
Fruit is a refreshing addition to your charcuterie! For small boards choose just one fruit, and maybe one more dried fruit option (not necessary).
- Fresh fruit: grapes, pomegranate, apples, pears, melon balls, pineapple, berries, figs.
- Dried fruit: figs, apricots, mangos, cherries
Spreads
At most, one spread is sufficient for a small charcuterie board.
- Sweet: apple butter, apricot jam, fig spread, and local honey with the honeycomb, balsamic fig glaze.
- Savory: stone ground mustard, mango chutney, ancho aioli
Sweets/extras
Chocolate is always a good idea in my opinion. For small boards, I’d choose 0-2 sweets/extras options. These help to act as filler for those blank spots in your board, and add variety and garnish to your board.
- Chocolate: chocolate-covered raisins, chocolate-covered pretzels, chocolated-covered bark, chocolate-covered nuts, chocolate-covered graham crackers.
- Candy: candied nuts, caramel popcorn, cookies, yogurt-covered pretzels.
- Savory: olives, sage leaves, nuts.
Serving Suggestions
Serving charcuterie boards are perfect for any occasion, grand or ordinary. Here are some ideas for when to serve a charcuterie board!
- Thanksgiving appetizer charcuterie board (make it look like a turkey)
- Christmas grazing board (make it look like a Christmas tree)
- Easter charcuterie platter (make it look like a bunny)
- New years eve charcuterie board
- Date night charcuterie board
- Picnic grazing board
- Summer get-togethers
Themed charcuterie board ideas
- Brunch charcuterie board (using all brunch foods)
- Dessert charcuterie platters (using all sweets)
- Hot chocolate board
- French fry theme (all types of fries and sauces like my ancho aioli and dill aioli!)
- Taco-themed charcuterie board
- Wine tasting theme (use foods that pair well with the wine you’ll be serving)
How to Choose a Platter for a Mini Charcuterie Board
To choose the perfect platter for your charcuterie board you’ll need to know what size you need. Small, medium, or large. Once you know that, you can look around for what you already have on hand. I guarantee you have something!
- Small charcuterie board platter idea: use a dinner plate (or salad plate for something very miniature).
- Medium grazing board idea: use a wooden cutting board that’s about medium size.
- Large charcuterie platter idea: use a baking sheet!
How to Save Money on Charcuterie Boards
- Go in with an open mind. Having a rigid idea of the vibe you want for your board will only make you spend more money to achieve that vision.
- Buy what’s on sale. Having an open mind helps you to be more willing to take advantage of sale items.
- Raid your pantry for what you already have. You’d be surprised! Most of that weird pantry stuff you’ve had forever is perfect for a charcuterie!
- Less is always more. Only buy one of everything (even if its’s something you really like!). Even that will be too much!
Shop this Post
(These affiliate links help to support this blog at no extra cost to you. Your support means the world to me!)
- Berkey water filter (we use the Royal because we drink an insane amount of water!)
- Thrive Market – 25% off & free gift! (where I get a ton of my ingredients)
- Azure Standard: $25 off your order. Code kyrieluke1
- Boos Block Butcher Block
More Appetizer Recipes
Roasted Garlic Sourdough Bread
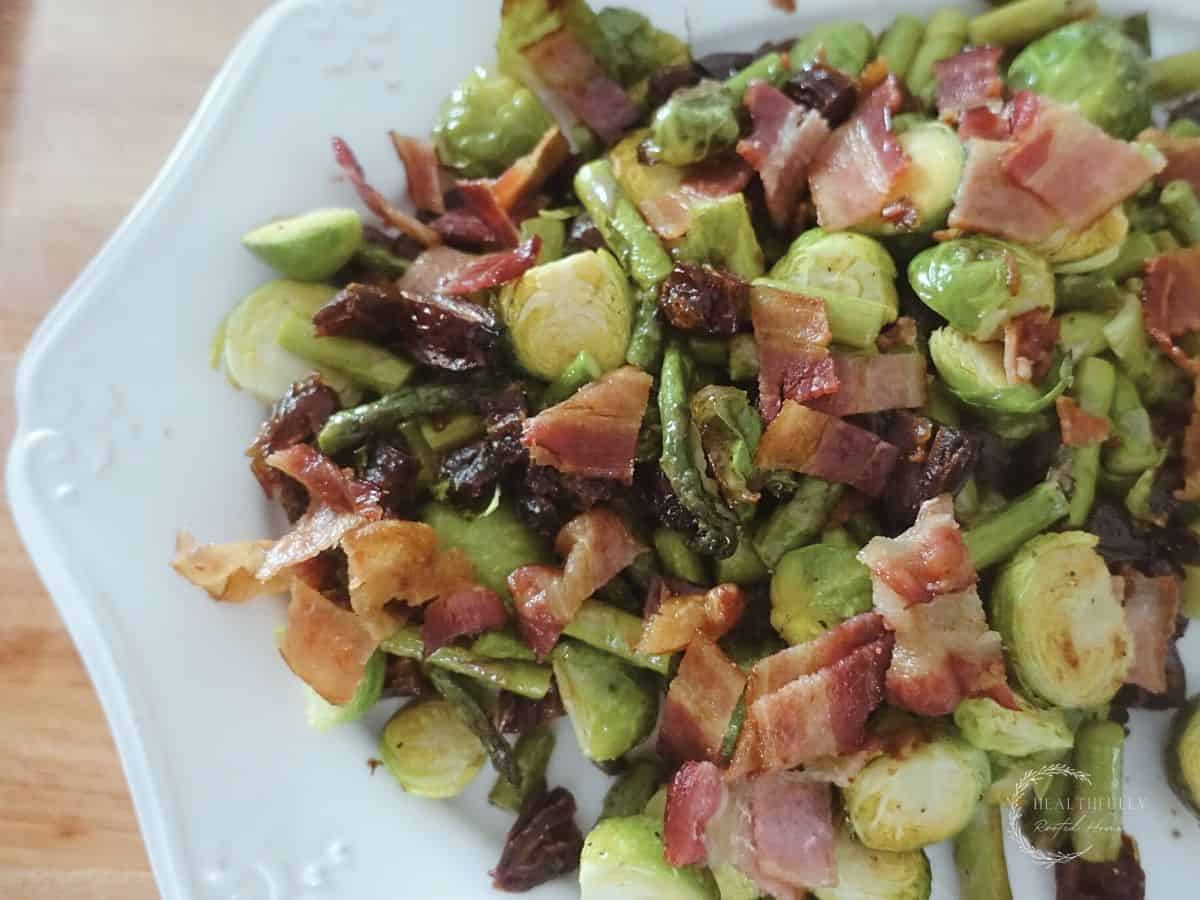
Roasted vegetables with dates and bacon
Small Charcuterie Board FAQ
Keep mini charcuterie boards basic with your typical meat, cheese, crackers, and fruit. Depending on the size, you might be able to sneak in some of the other adornments, like spreads, olives, and chocolate – but you won’t want to offer many options in any category.
You can put all the same things from a larger charcuterie board, on a small charcuterie for two – just fewer options and a smaller quantity. For example, where a larger charcuterie may have 4-5 meat options, a smaller one should only have 1-2.
Charcuterie boards can be any size depending on the number of mouths you’re feeding. Consider 3-5oz of each category of food per person – meat, cheese, crackers, fruit, etc.
The layout of a charcuterie board is totally up to you! You can keep it symmetrical or have random placement of your food; you could have a focal point or none at all. In any case, you’ll want to play with varying heights and textures to keep it visually appealing.
A charcuterie board can be the main course, or an appetizer before the real deal. Since charcuterie boards are meat-heavy, you could serve a large salad with lots of vegetables. Or, pasta would be a great choice as well.
There are a few different types of charcuterie meats and tons of options within those categories.
Whole meat: prociutto, bresaola and jamòn
Smooth meat: rillettes, and pate.
Cured: Salami, Saucisson sec, Spanish chorizo
Dry: bacon, or pancetta
shar-KOOT-ter-ee is the correct pronunciation.
Charcuterie is a great option for an appetizer, but it can also be the main dish. If you’re serving as a main dish you’ll want to include heavier options than if you serve as an appetizer.
Pin it – How to Make a Small Charcuterie Board
Related: beef crostini recipe
Print the Small Charcuterie Board Recipe
Small Charcuterie Board for Two
Equipment
- 1 small platter see notes on how to choose the perfect platter
Ingredients
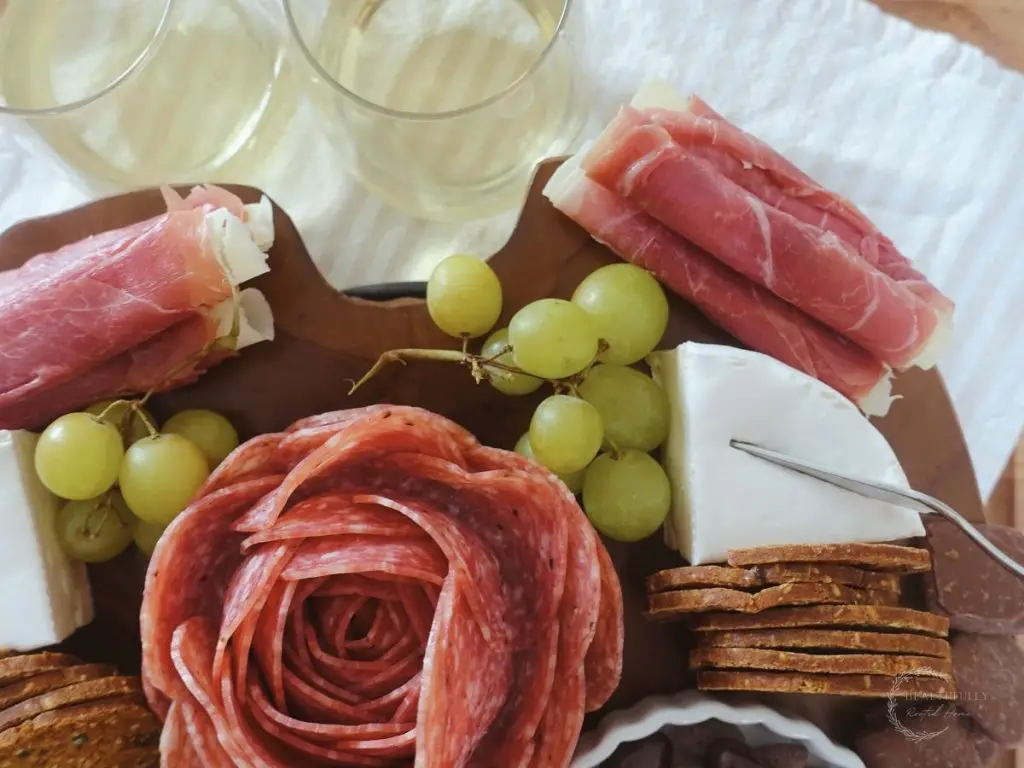
- 6 prosciutto wrapped cheese rolls
- 3 small bunches of grapes green or red
- 1/2 brie cheese wheel
- 1 full package genoa salami
- dried fig and olive crackers
- crostini
- chocolate covered graham crackers
- 6 oz smoked gouda cheese
- mix of cocoa disted almonds and himalayan sea salt almonds
- 1 batch balsamic-fig glaze
Instructions
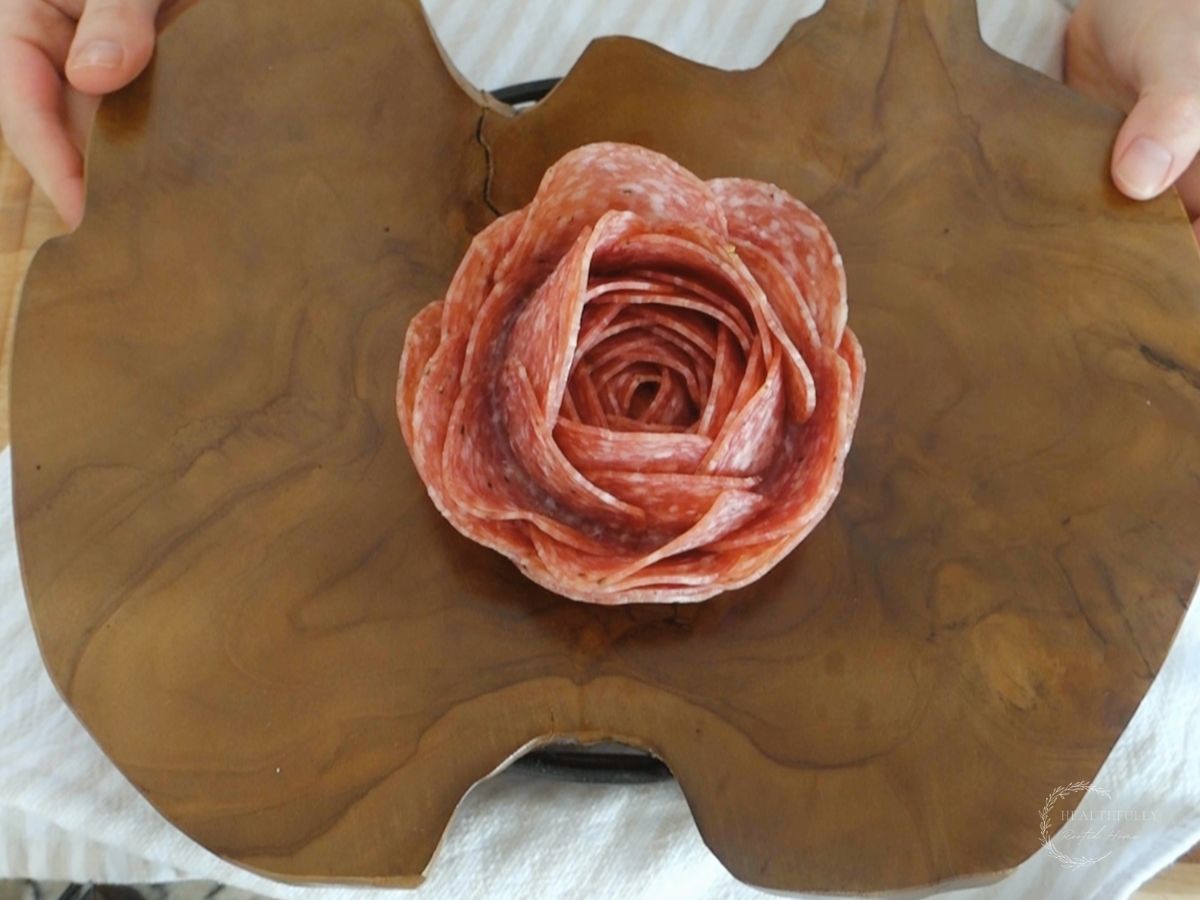
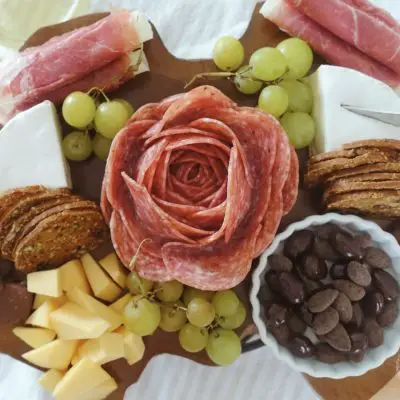
- Create your salami rose by opening your package of salami and placing each piece on the rim of a wine glass, covering the circumference of the glass with each piece of meat. Do this in layers until you reach the end of the package. Place your hand on top of the meat, then flip the glass over to gently remove the salami rose.
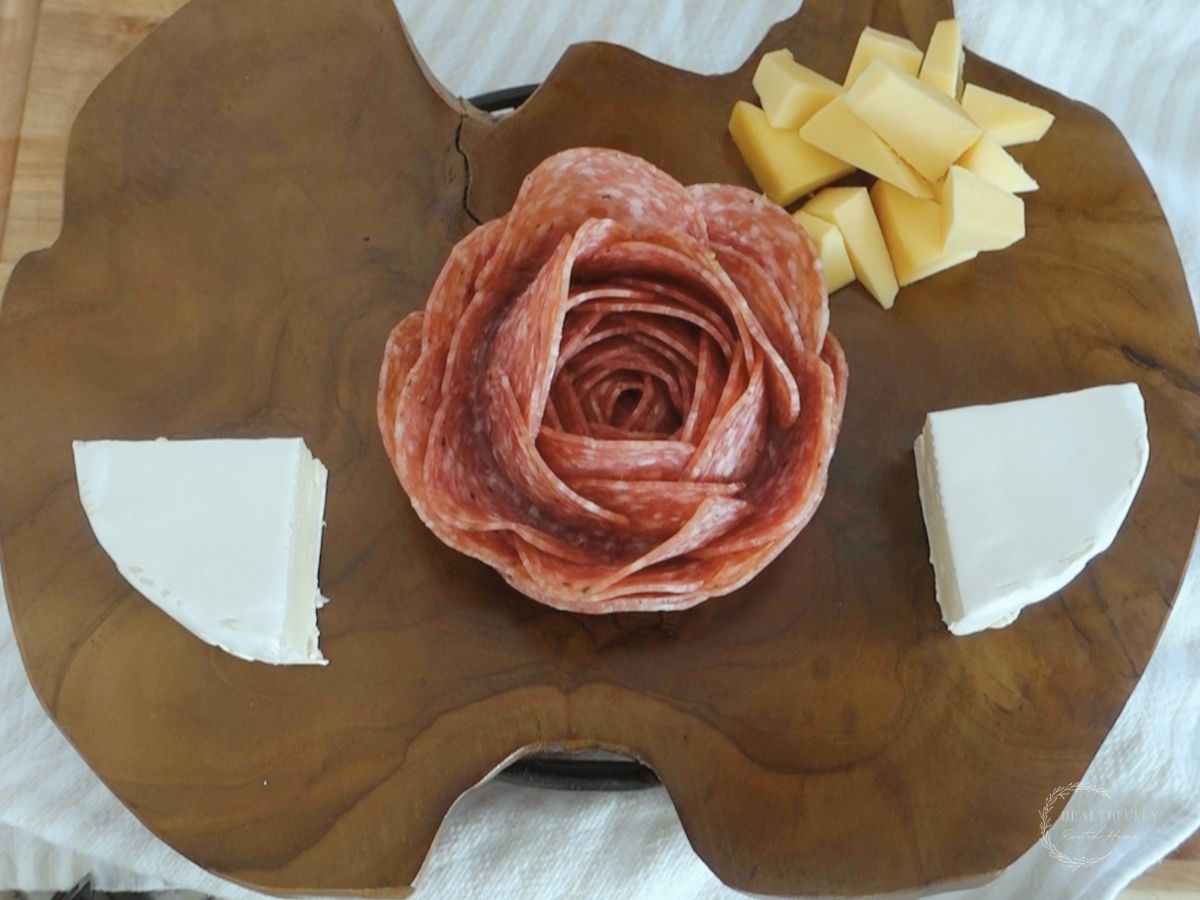
- Slice the gouda cheese into triangles, then the brie cheese in half (since you're only using half the wheel it would be quartered).
- Place your almond mix into a ramekin.
- Snip off 3 small bunches of grapes.
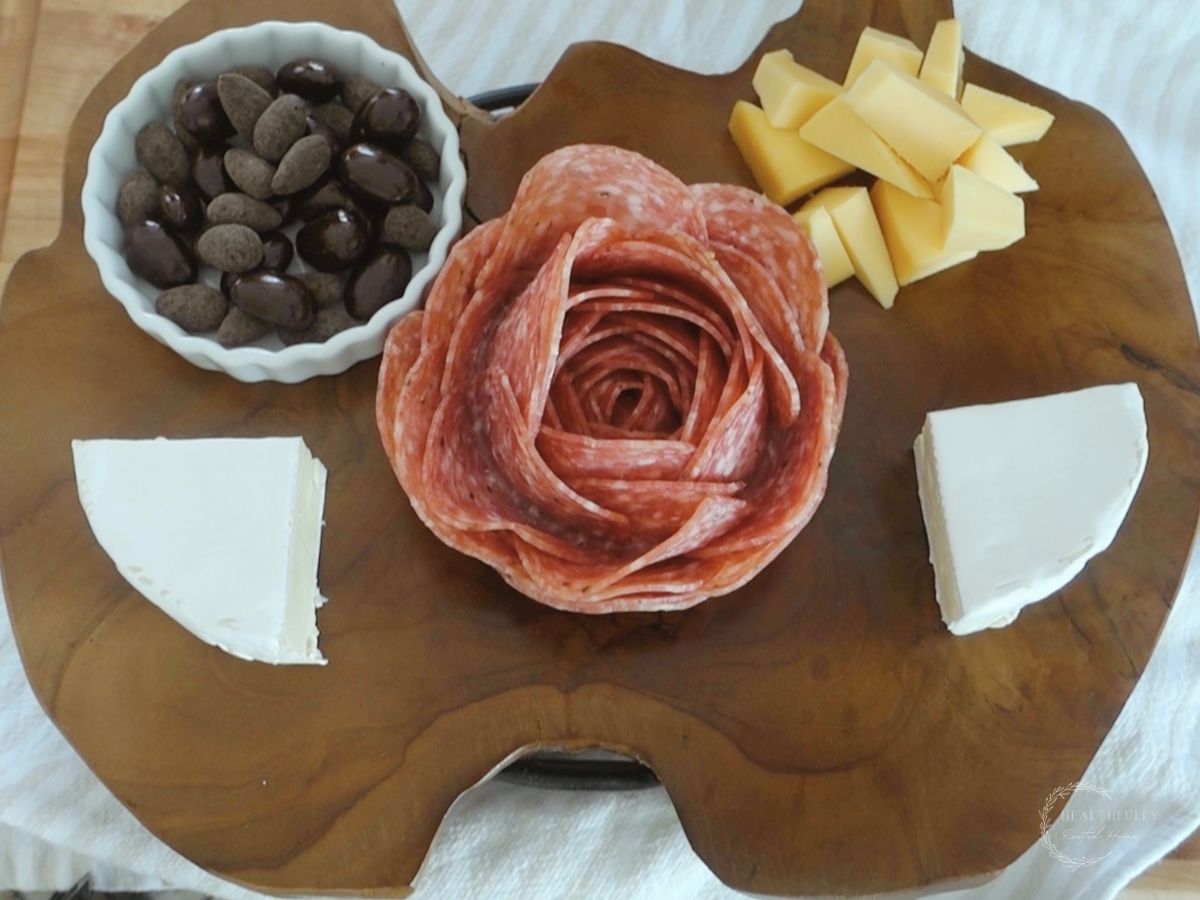
- Assemble your board by placing the salami rose in the center, then the brie slices on either side toward the top. Place the almonds below and to the right of the salami rose. Assemble everything else in a way that looks appealing to you. (see notes below on how to assemble a charcuterie board).
Video
Notes
steps for making a small charcuterie board
- Choose a platter – see tips below on how to choose the right platter.
- Create a focal point – this is optional, and some people like more of a random assortment, but I like to work off of a focal point.
- Raid your pantry – use what you already have to get your charcuterie board started. You might have more than you think!
- Shop for the extras – the fun part, make a list and fill in any gaps (see tips below for saving money on a charcuterie board).
- Assemble the board – see below for specifics.
how to assemble a charcuterie board
There are so many ways to assemble a charcuterie board. Some say to start with the cheese, some say the meat. Others like to start with the jar or big things first. Personally, I like to start with the larger items and then work my way out to the smaller items.how to store a charcuterie board
Since you’re making a small charcuterie board, it’s likely you won’t need to store anything after all, but, if you do, here’s how to store your leftovers. The storing process of a charcuterie board starts before you even assemble the board – by saving your packaging! For example, if you have nuts that came in a bag or container, save it so you can pour the nuts back in. Then, be sure to pack things separately and store them properly. Meat and cheese should go in airtight containers and be stored in the fridge, crackers in the pantry, etc.small charcuterie board Tips
Use canisters & ramekins – these can help to add texture, height, and functionality to your charcuterie. Use them to add sauces, nuts, or anything you’d like to keep separate from the rest of the board. Don’t overthink it – just start and don’t overthink it. Once you get the ball rolling with assembling your board the rest comes easy. Shop discounts – give yourself a goal to find everything at a discount store or in the discount section – this can help to spark your inspiration for the whole board! Find inspiration – go to Pinterest and find inspiration! Use what you already have – You probably have some charcuterie board elements in your pantry right now! I always find weird things in my pantry that we wouldn’t eat on a regular basis, but are great for a charcuterie board. Make a focal point – I like to use a focal point, like a salami rose, to be the centerpiece for my charcuterie boards. Vary heights – Use variable heights to create aesthetic appeal. Add a variety of colors and textures – this also adds to the visual appeal of a charcuterie board. Using contrasting colors and textures makes for a beautiful board. Garnish with something edible – I like using fruit as a garnish, but you could use a tasty herb too! Have a theme to draw back to – having a theme to your charcuterie can act as a good anchor for creating your board.How to choose the perfect platter for a mini charcuterie board
To choose the perfect platter for your charcuterie board you’ll need to know about what size you need. Small, medium, or large. Once you know that, you can look around for what you already have on hand. I guarantee you have something!- Small charcuterie board platter idea: use a dinner plate (or salad plate for something very miniature).
- Medium grazing board idea: use a wooden cutting board that’s about medium size.
- Large charcuterie platter idea: use a baking sheet!
About Me


This is nice but the video was not helpful when trying to make the salami rose. It went so fast that you really couldnt follow it. But everything else which was fairly simple went real slow. Could the video be slowed down so you can watch the salami rose? Otherwise it’s not very helpful.
Great to know! Thank you! I can’t slow down the video but I can try to make another one so it’s more helpful. 🙂
Thanks for stopping by! Please let me know how you like this recipe!